

How to Blend Hair Extensions Seamlessly
Table of Contents
- Understanding Hair Density and Extension Weight for Seamless Blending
- Strategic Placement and Sectioning Techniques
- How to Cut Hair Extensions for Layers and Natural Movement
- Color Matching and Tone Correction
- Best Styling Tools for Hair Extensions and Heat Blending
- How to Prevent Hair Extension Tangling and Maintain Blend Quality
- Advanced Techniques for Specific Hair Types
- Addressing Base Hair and Hairline Coverage
Last Updated: August 30, 2026
According to Fortune Business Insights, human hair extensions held a leading market share of 57.32% in 2025 and are projected to grow at a compound annual growth rate of 7.12% from 2026 to 2034. Yet the real challenge isn't finding extensions, it's making them look natural. At Millionaire Beauty Brand Extensions, we've worked with thousands of clients who've struggled with visible lines, texture mismatches, and that telltale "shelf" effect. The difference between seamless blending and obvious extensions comes down to three core factors: understanding your hair density, strategic placement, and precision cutting.
Understanding Hair Density and Extension Weight for Seamless Blending
Getting the weight right is where most people fail. If your extensions are too heavy for your natural hair density, they'll slip and create visible gaps. Too light, and they won't provide the volume you're paying for.
Research from Market Research Future shows that nearly 90% of women who wear extensions keep them a secret from friends and family, indicating a strong preference for a natural look. That naturalness starts with weight distribution that matches your hair's actual density.
The professional salon industry represents 46% of hair extension sales in the U.S., and for good reason, stylists understand that density matching is non-negotiable. Millionaire Beauty Brand Extensions offers professional-grade wefts.
Strategic Placement and Sectioning Techniques
Where you place your extensions determines whether they blend or stand out. Poor placement creates visible lines and that awkward "helmet" effect where extensions sit as a separate unit.
Start at the nape of your neck as your foundation. Section your hair horizontally, about a quarter-inch from the scalp. This spacing prevents extensions from sitting too close to your skin, which causes discomfort and visibility. For clip-in extensions, diagonal placement of side wefts enhances natural movement around the face.
The key is alternating weft sizes. Don't stack identical rows on top of each other. Use smaller wefts in strategic spots and larger ones where you need more coverage. This variation prevents the "stacked" appearance that signals extensions.
Divide your head into quadrants before placing anything. Work methodically through each section, maintaining consistent spacing. Proper sectioning takes an extra 15-20 minutes but eliminates 90% of visible blending problems.
How to Cut Hair Extensions for Layers and Natural Movement
Extensions arrive as one uniform length. Your job is to transform them into something that moves like natural hair.
Precision Cutting to Eliminate Blunt Lines
A blunt line at the ends of extensions is the dead giveaway. Precision cutting eliminates that line entirely.
Use sharp scissors and cut at a vertical angle, not horizontal. Point your scissors downward at approximately 45 degrees and make small, deliberate cuts through both your natural hair and extensions simultaneously. This creates a soft, feathered edge that blends seamlessly. Never cut extensions while they're clipped out; cut them while they're in your hair.
Start at the underneath layers and work your way up. Take small sections, about half an inch wide. Each cut should remove just a quarter-inch. Subtle layers work better than dramatic ones, aim for a quarter-inch to half-inch difference between layers, not dramatic two-inch jumps.

Texturizing and Thinning for a Polished Finish
After cutting layers, texturizing removes that heavy, shelf-like appearance. Thinning shears remove bulk without creating choppy texture.
Work through the outer layers of your extensions, making vertical cuts with thinning shears. Two to three passes through each section is usually enough. The goal is to reduce density gradually, not create gaps. Texturizing should be invisible; viewers should just see natural movement.
Color Matching and Tone Correction
Even perfect placement and cutting fail if the color is wrong. Extensions that don't match your natural hair stand out immediately.
Start by identifying your natural hair's undertone. Is it warm (golden, red, copper)? Cool (ashy, blue)? Neutral? Hold your natural hair next to potential extensions in natural daylight, not under salon lighting. Fluorescent lights lie.
Match not just the shade level but the dimension. Natural hair has variation, lighter pieces at the ends, darker roots, subtle highlights. Extensions should too. A flat, one-dimensional color always looks fake. According to Great Lengths, Pantone's Color of the Year Mocha Mousse became a leading choice in salon requests in 2025, demonstrating a preference for natural-looking shades.
Millionaire Beauty Brand Extensions offers 40+ shades available for perfect color matching, including warm, cool, and neutral tones in every level. If you can't find an exact match, go slightly lighter rather than darker.
Best Styling Tools for Hair Extensions and Heat Blending
The most powerful blending technique is styling both natural hair and extensions together with heat tools. This fuses the strands into a unified pattern, masking disparities in length and texture.
For straight styles, run a flat iron through both natural hair and extensions together. Work in small sections, about an inch wide, starting at the roots and moving toward the ends. The heat tool should touch both simultaneously, creating the seamless blend.
For curled or wavy styles, use a curling wand on both sections together. Wrap natural hair and extensions around the wand simultaneously, holding for three to five seconds. This creates unified waves that move as one unit.
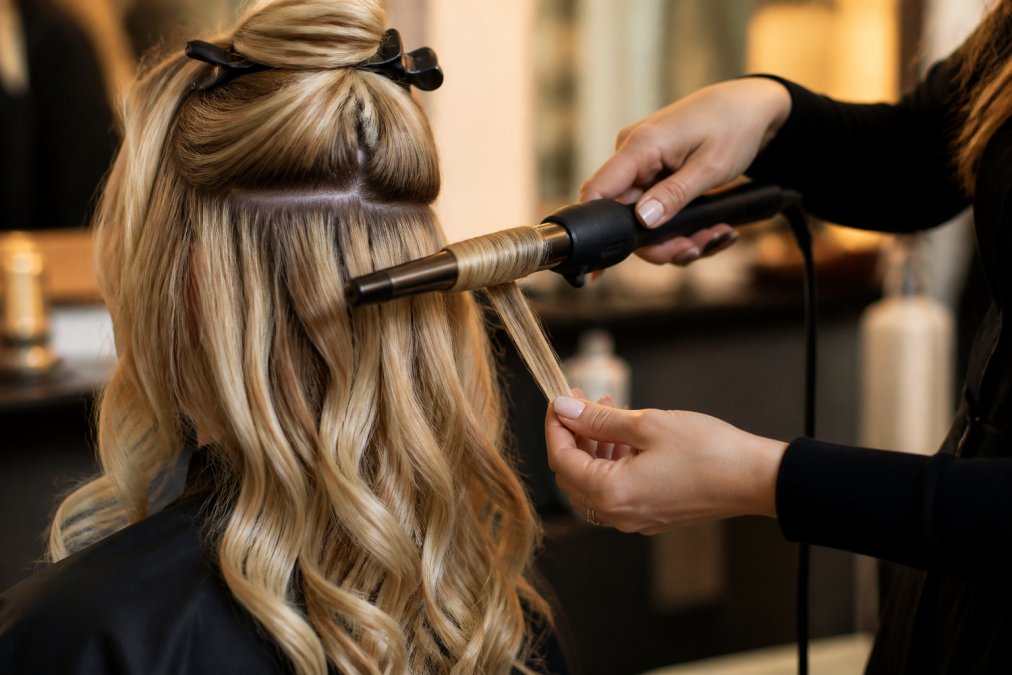
Professional-grade tools with consistent temperature control matter. Millionaire Beauty Brand Extensions recommends investing in quality tools to protect your extensions. Heat styling reinforces the blend, after two or three days of consistent styling, extensions feel like natural hair.
How to Prevent Hair Extension Tangling and Maintain Blend Quality
Once you've achieved a seamless blend, maintaining it requires consistency. The biggest threat is tangling, which creates visible clumps.
Brush extensions gently, always from ends to roots. Never start at the scalp and pull downward. Use a wide-tooth comb or a brush specifically designed for extensions. Millionaire Beauty Brand Extensions offers professional-grade tools like hair extension scissors ($15.00) and pliers ($40.00).

Sleep with extensions in a loose braid or bun to prevent tangling overnight. Wash extensions in cool water with sulfate-free shampoo. Hot water opens the hair cuticle and causes tangling. Deep condition once weekly with a treatment designed for human hair extensions.
Advanced Techniques for Specific Hair Types
Different hair types require different blending strategies.
Blending Extensions with Curly and Coily Hair
Identify your curl pattern and choose extensions that match exactly. A straight extension in coily hair is immediately obvious.
Placement is more critical with curly hair. Increase your spacing by about 25% compared to straight hair to prevent visible bulking. Use curl-defining products and finger-coiling or braiding techniques instead of flat irons or curling wands.
Managing Extensions with Fine Hair
Choose lightweight extensions specifically designed for fine hair. Use more, smaller wefts instead of fewer, larger ones to distribute weight evenly. Space wefts at least a half-inch apart to prevent matting.
Cut fine hair extensions more aggressively than thick hair. Fine hair needs movement and dimension to look full. Avoid heavy products that weigh hair down; use volumizing sprays instead.
Blending Extensions for Hair Loss and Thinning
Place extensions where natural hair is thinnest, using them to fill gaps rather than add length. Shorter extensions, 12 to 16 inches, blend more naturally than full-length pieces.
Clip-in extensions are often the best choice for thinning hair because they're removable and adjustable. According to E Litchi, more than 5.2 million consumers purchased human hair extensions annually in the U.S. in 2024, with 65% preferring clip-in products. Color matching is especially important with thinning hair, any mismatch becomes obvious when natural hair is sparse.
Addressing Base Hair and Hairline Coverage
Short hairs at the nape and hairline are the biggest blending challenge. For nape hair, gather the short section, twist it tightly against the scalp, and pin it flat with bobby pins. For short hair overall, braiding or twisting the short pieces at the base keeps them in place.
Hairline coverage requires strategic placement. Place clip-in extensions slightly behind your natural hairline, not directly at it. For permanent extensions, ensure placement begins at least a half-inch behind the hairline.
Hair extension pliers ($40.00) from Millionaire Beauty Brand Extensions are essential for adjusting placement and securing extensions precisely. If you have a receding hairline or significant hair loss at the hairline, consider consulting with a stylist about alternative options like toppers or full-coverage solutions designed specifically for hairline coverage.
=== FAQ ANSWERS (audit these too, same rules) ===
[1] Q: How do I make my extensions blend better with my natural hair? A: Seamless blending requires three key steps: match your extension color and texture to your natural hair when styled, use strategic weft placement starting at the nape and alternating sizes, and style both natural hair and extensions together with heat tools. Professional trimming and layering are essential to eliminate shelf-like lines. More than 5.2 million consumers purchased human hair extensions annually in 2024, with 65% preferring clip-in products for their ease of repositioning and blending flexibility.
[2] Q: What is the best way to cut hair extensions to match my layers? A: Trim extensions while clipped in, using scissors at a vertical downward angle to create soft, blended ends rather than blunt lines. For thick hair, proper layering prevents bulkiness, thin out the outer layers strategically. For fine hair, avoid over-layering to maintain density and weight. Professional trimming prevents the heavy, shelf-like appearance that makes extensions obvious.
[3] Q: How can I prevent my hair extensions from tangling? A: Prevent hair extension tangling by brushing gently from ends to roots using a wide-tooth comb, storing extensions properly when not worn, and using quality hair care products designed for extensions. Avoid sleeping in extensions without protective styling, and minimize friction by using silk pillowcases. Regular conditioning maintains the hair's integrity and reduces tangling. Proper maintenance of your extensions ensures they maintain their seamless blend and polished appearance over time, protecting your investment in premium human hair.
[4] Q: Can heat styling really help extensions blend more naturally? A: Yes, styling both natural hair and extensions together with heat tools is highly effective for seamless blending. Running a flat iron through both simultaneously unifies texture and shine, while curling wands create cohesive wave patterns that mask length differences. This technique fuses the strands into a unified pattern, making disparities nearly invisible. Heat styling is one of the most powerful methods for achieving an undetectable finish, especially for straight styles or defined curls.
Frequently Asked Questions
How do I make my extensions blend better with my natural hair?
Seamless blending requires three key steps: match your extension color and texture to your natural hair when styled, use strategic weft placement starting at the nape and alternating sizes, and style both natural hair and extensions together with heat tools. Professional trimming and layering are essential to eliminate shelf-like lines. More than 5.2 million consumers purchased human hair extensions annually in 2024, with 65% preferring clip-in products for their ease of repositioning and blending flexibility.
What is the best way to cut hair extensions to match my layers?
Trim extensions while clipped in, using scissors at a vertical downward angle to create soft, blended ends rather than blunt lines. For thick hair, proper layering prevents bulkiness, thin out the outer layers strategically. For fine hair, avoid over-layering to maintain density and weight. Professional trimming prevents the heavy, shelf-like appearance that makes extensions obvious.
How can I prevent my hair extensions from tangling?
Prevent hair extension tangling by brushing gently from ends to roots using a wide-tooth comb, storing extensions properly when not worn, and using quality hair care products designed for extensions. Avoid sleeping in extensions without protective styling, and minimize friction by using silk pillowcases. Regular conditioning maintains the hair's integrity and reduces tangling. Proper maintenance of your extensions ensures they maintain their seamless blend and polished appearance over time, protecting your investment in premium human hair.
Can heat styling really help extensions blend more naturally?
Yes, styling both natural hair and extensions together with heat tools is highly effective for seamless blending. Running a flat iron through both simultaneously unifies texture and shine, while curling wands create cohesive wave patterns that mask length differences. This technique fuses the strands into a unified pattern, making disparities nearly invisible. Heat styling is one of the most powerful methods for achieving an undetectable finish, especially for straight styles or defined curls.
Blending hair extensions seamlessly isn't magic, it's technique. Master density matching, strategic placement, precision cutting, and heat styling, and you'll achieve results that look completely natural. The investment in quality extensions and professional tools pays dividends in comfort, appearance, and longevity. Start with Millionaire Beauty Brand Extensions's professional-grade extensions and tools, and you'll have the foundation for seamless blending that lasts.
This article was written using GrandRanker