

Preventing Shedding in Human Hair Wigs: 2026 Guide
Table of Contents
- Shedding vs. Breakage: How to Tell What You're Actually Losing
- Step 1: How to Seal Knots on a Wig to Stop Shedding at the Source
- Step 2: How to Wash a Human Hair Wig Without Shedding
- Step 3: The Best Brush for Human Hair Wigs (and How to Use It)
- Step 4: Heat Styling, Chemical Processing, and Shedding Risk
- Step 5: Storage, Climate, and Post-Repair Longevity
- When Preventing Shedding in Human Hair Wigs Requires a New Unit
- Frequently Asked Questions
Last Updated: September 21, 2026
Shedding vs. Breakage: How to Tell What You're Actually Losing
Preventing shedding in human hair wigs starts with one question: is the hair falling from the root, or snapping mid-strand?
- Shedding: long strands with a tiny bulb or knot residue at one end
- Breakage: short pieces, split ends, no bulb
- Shedding: hair appears at the base, near the cap or weft
- Breakage: hair appears mid-length or at the ends
A useful benchmark: premium human hair should show zero shedding within the first six months, per SuperWeaveHair's 2026 quality benchmarks. If you're losing a full brush of strands in month two, something is wrong at the root.
Step 1: How to Seal Knots on a Wig to Stop Shedding at the Source
Learning how to seal knots on a wig is the single most effective fix for root-level shedding. Knot sealer is a light adhesive that locks the hand-tied knots inside a lace front or monofilament cap, so strands stay put through washing and styling. Most competitors stop there. The mechanism matters more than the product name: each hand-tied knot is a single loop of hair pulled through the lace mesh, and that loop only holds because friction and a small amount of latex or acrylic binder keep it cinched.
Here's how to apply it:
- Turn the wig inside out and lay it on a wig stand
- Find the knots on the inside of the wig cap
- Apply a thin line of sealer directly onto each knot
- Let it cure fully, usually overnight
- Test with a gentle tug before wearing
DIY Knot Resealing: What Works and What Ruins the Cap
Bleaching knots is one process that can backfire. Some wearers and specialists report that the chemical process weakens hair at the base, making it shed more over time, according to discussions in the r/Wigs community.
- Water-based or latex-based binders cure flexible and stay slightly tacky, so they move with the cap instead of cracking
- Clear-drying formulas avoid the white residue that shows through a lace front under bright light
- Low-odor, non-flammable labels matter because you're working inches from your face and the cap is often synthetic mesh
- Avoid cyanoacrylate (super glue) and hot-glue sticks, both cure rigid, generate heat as they set, and will snap the knot the first time you brush
- Work in sections no wider than two inches so you can see each knot under good light
- Use a fine-tip applicator or a toothpick, a drop the size of a pinhead per knot is enough
- Press the knot flat against the lace with a silicone-tipped tool so the binder wicks into the loop, not around it
- Let the section cure 20-30 minutes before moving to the next one, then leave the whole cap undisturbed overnight
- Do a pull test on a hidden back row before you wear it out
How Long a Resealed Wig Actually Lasts
Post-repair longevity is the question almost no guide answers. A resealed unit typically holds for two to four months of regular wear before the binder fatigues and the knots loosen again. Three variables shorten that window:
- Wash frequency, every wash cycle stresses the binder; washing twice a week instead of daily can roughly double the interval between reseals
- Heat exposure, blow dryers and flat irons aimed near the cap soften the adhesive and let knots slip
- Cap condition, once lace mesh frays or a weft thread breaks, resealing buys weeks, not months, and replacement becomes the better spend
Step 2: How to Wash a Human Hair Wig Without Shedding
Learning how to wash a human hair wig without shedding comes down to three things: gentleness, temperature, and drying method. Rough washing is the top cause of avoidable strand loss.
Follow this routine:
- Detangle dry hair first with a wide-tooth comb
- Fill a basin with cool to lukewarm water
- Add a small amount of sulfate-free shampoo
- Dip and squeeze gently, never scrub or twist
- Rinse until the water runs clear
- Apply conditioning mask mid-length to ends
- Pat dry with a towel, then air drying only
Sulfate-Free Shampoo, Water Temperature, and Drying Without Friction
Sulfates strip moisture balance from the human hair cuticle, leaving strands dry and brittle. Hot water does the same. Both speed up hair breakage even when the knots hold fine.
Cool water, sulfate-free shampoo, and air drying protect the cuticle. That's what keeps a wig tangle-free and secure for months.
Step 3: The Best Brush for Human Hair Wigs (and How to Use It)
The best brush for human hair wigs is a bristle brush with soft, flexible bristles, paired with a wide-tooth comb for wet hair. Stiff brushes snag knots and pull strands loose at the base.
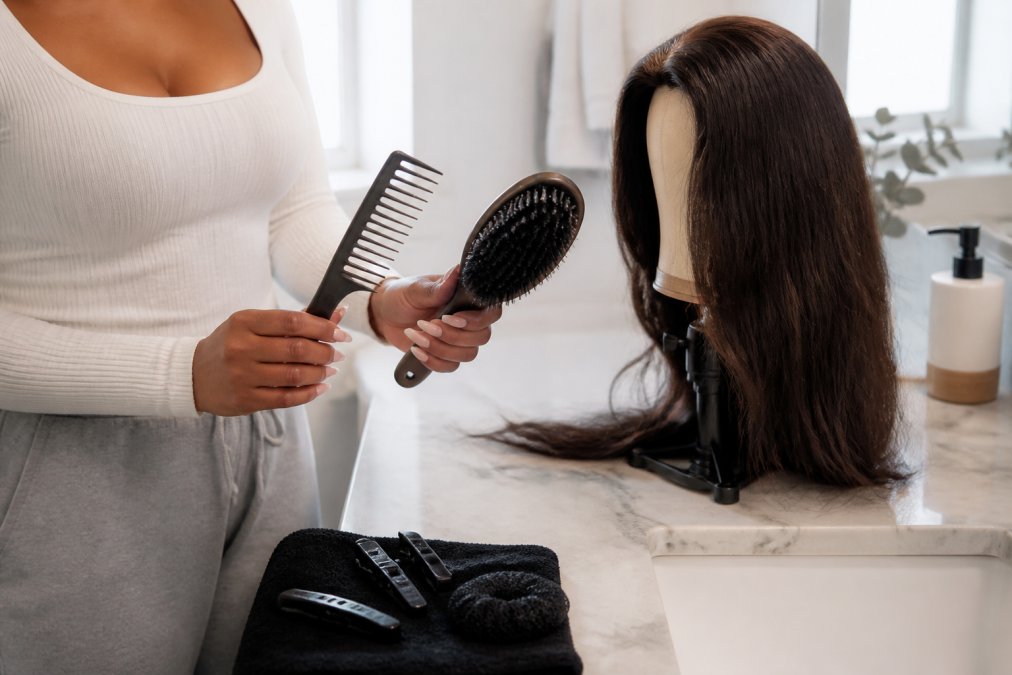
- Comb wet hair only, and only with a wide-tooth comb
- Brush dry hair in small sections
- Hold the mid-shaft to reduce tension on the knots
- Skip brushing entirely when hair is soaking wet
Step 4: Heat Styling, Chemical Processing, and Shedding Risk
Heat damage weakens the hair shaft, and weakened strands shed and break faster. Keeping styling tools under 350 degrees Fahrenheit protects the cuticle and reduces risk. But the more useful skill is telling heat breakage apart from true shedding, because the two look similar in a brush and demand opposite responses.
Run this diagnostic after a heat-styling session:
-
True shedding: full-length strands with a small bulb or knot residue at the base. The knot failed. Reseal or tighten.
-
Heat breakage: short pieces, often one to three inches, with a blunt or frayed end and no bulb. The shaft failed. Sealer will do nothing here.
-
Chemical breakage: strands that snap at a consistent point along the length, sometimes with a gummy or stretchy feel before they break. The protein structure is compromised.
-
Always use a heat protectant spray
-
Keep flat irons and curling wands on low to medium heat
-
Limit heat styling to once or twice a week
-
Avoid overlapping heat on the same section
-
Never apply direct heat to a wet or damp unit, the water inside the shaft flashes to steam and splits the cuticle from within
Step 5: Storage, Climate, and Post-Repair Longevity
Where and how you store a wig affects how long it lasts after any repair. Humidity, heat, and sunlight all stress the hair and the cap over time.
- Use a stand or mannequin head to hold the shape
- Cover with a silk or satin bag to cut friction
- Keep away from radiators and windows
- Rotate wigs so each one rests between wears
A repaired wig can last just as long as a new one if you keep it conditioned, stored properly, and away from heat. Post-repair longevity is about maintenance, not luck.
When Preventing Shedding in Human Hair Wigs Requires a New Unit
Sometimes the damage is past saving. If knots are gone, the cap is torn, or strands snap along the whole length, no routine will bring it back. A new unit is the smarter buy.
Signs it's time to replace:
- Knots have dissolved or the cap is frayed
- Hair sheds in clumps no matter what you do
- Strands snap mid-shaft across the whole wig
- The hair feels dry and brittle after conditioning
| Problem | Likely Cause | Fix |
|---|---|---|
| Long strands with bulbs | Loosened knots | Apply knot sealer |
| Short, split pieces | Heat or chemical damage | Lower heat, deep condition |
| Shedding after washing | Rough handling, hot water | Cool water, sulfate-free shampoo |
| Tangling and matting | Dry cuticle, friction | Light oil, silk storage |
| Clumps of hair falling | Failing cap or weft | Replace the unit |
Frequently Asked Questions
Why does my human hair wig shed so much?
Most shedding traces back to three causes: loose knots at the cap, friction from the wrong brush, and washing with harsh sulfates. Industry benchmarks for 2026 define premium human hair as having zero shedding within the first 6 months of use, so a unit that sheds heavily from day one likely has a construction or knot-sealing issue rather than normal wear. Check your knots first, then review your wash and brush routine before assuming the hair is failing.
Can you seal the knots on a human hair wig to stop shedding?
Yes. Knot sealers are applied to the inside of the cap, where they coat each knot and lock the hair in place. Apply in thin layers with a small brush and let each layer dry fully before adding another. Some users on r/Wigs report that bleaching knots weakens the hair at the base and increases shedding over time, so if your unit has been lightened at the cap, seal gently and avoid tugging those areas when you comb or wash.
How often should I wash my human hair wig to prevent damage?
Wash every 8 to 10 wears, or sooner if you use heavy styling products. More frequent washing strips moisture balance from the human hair cuticle, which leads to dryness, split ends, and breakage that looks like shedding. When you do wash, use a sulfate-free shampoo, work it downward from mid-length to ends, and never scrub the cap area where the knots sit. Air dry on a wig stand whenever possible.
Does brushing cause shedding in human hair wigs?
Brushing causes shedding when the tool or technique is wrong. A bristle brush or wide-tooth comb used on dry hair, starting at the ends and working upward, removes tangles without pulling at the knots. Brushing wet hair, yanking through tangles, or using a fine-tooth comb on a lace front all put tension on the weft and cap construction. Detangle first with your fingers or a wide-tooth comb, then finish with a soft brush.