

How to Blend Hair Extensions Naturally: 2026 Guide
Table of Contents
- Step 1: Match Your Extension Method to Your Hair Type
- Step 2: Master Color Matching and Tone Synchronization
- Step 3: How to Cut Hair Extensions for a Natural Layer
- Step 4: The Best Tools for Blending Hair Extensions
- Step 5: Strategic Placement of Wefts and Safe Zone Identification
- Step 6: How to Prevent Hair Extension Tangling
- Step 7: Styling Techniques for Seamless Integration
- Blending Extensions for Fine or Thinning Hair
- Frequently Asked Questions
Last Updated: September 12, 2026
Step 1: Match Your Extension Method to Your Hair Type
The global hair extensions market reached $3.1 billion in 2026, and it's on track to hit $6.3 billion by 2035 at an 8.1% CAGR (Custom Market Insights market report). That growth means more options than ever, and more ways to get the blend wrong. Learning how to blend hair extensions naturally starts before installation: with matching the method to your hair type. Fine hair needs lightweight clip-ins or tape-ins to avoid excess weight and slippage. Medium to thick hair handles hand-tied wefts and volume-heavy methods without stress on the follicle. Coarse or textured hair pairs best with methods that let you customize density per section. Choose the wrong method and no amount of cutting or styling will hide it.
Step 2: Master Color Matching and Tone Synchronization
Color matching is where most installations fall apart. A 2026 industry analysis notes that color choices are shifting away from blunt contrasts and chunky highlights toward richer, multi-tonal dimensions that mimic how natural hair actually reflects light (Lya Hair 2026 extension trends). At Millionaire Beauty Brand Extensions, our 40+ shade range exists precisely because "close enough" color is the fastest route to an obvious install. Match to your mid-lengths and ends, not your roots, since that's where the extension sits. Then check the tone in three lighting conditions: daylight, indoor warm light, and overhead cool light. Tone mismatches that vanish in the salon reappear in photographs.
Step 3: How to Cut Hair Extensions for a Natural Layer
Precision cutting is what separates a believable install from a visible one. Professionals increasingly use slide-cutting and razor-cutting on the perimeter of natural hair to bridge the gap between natural length and extension length (Wayne Tuggle Hair styling techniques). The goal is a tapered, layered transition rather than a blunt wall of hair.
The mechanics matter more than the tool. Work on dry hair in its installed position, never wet, wet hair stretches and springs back shorter, so a wet cut will read uneven once it dries. Divide the head into four quadrants, then take horizontal subsections no wider than the width of your shears. Hold each subsection at a consistent elevation (about 45 degrees for a soft perimeter, 90 degrees for interior layering) and keep even tension between your fingers. Uneven tension is the number one cause of a choppy line.
For the perimeter, point-cut or slide-cut downward through the ends rather than cutting straight across. Point-cutting removes weight without creating a hard edge; slide-cutting opens the ends so they feather into the natural hair. Never cut straight across a weft, that produces the shelf line that makes extensions obvious from across a room. For interior blending, use a razor on the last two inches of the natural hair to soften the density where it meets the weft, then check the blend every few cuts by running your fingers root to tip and letting the hair fall naturally.
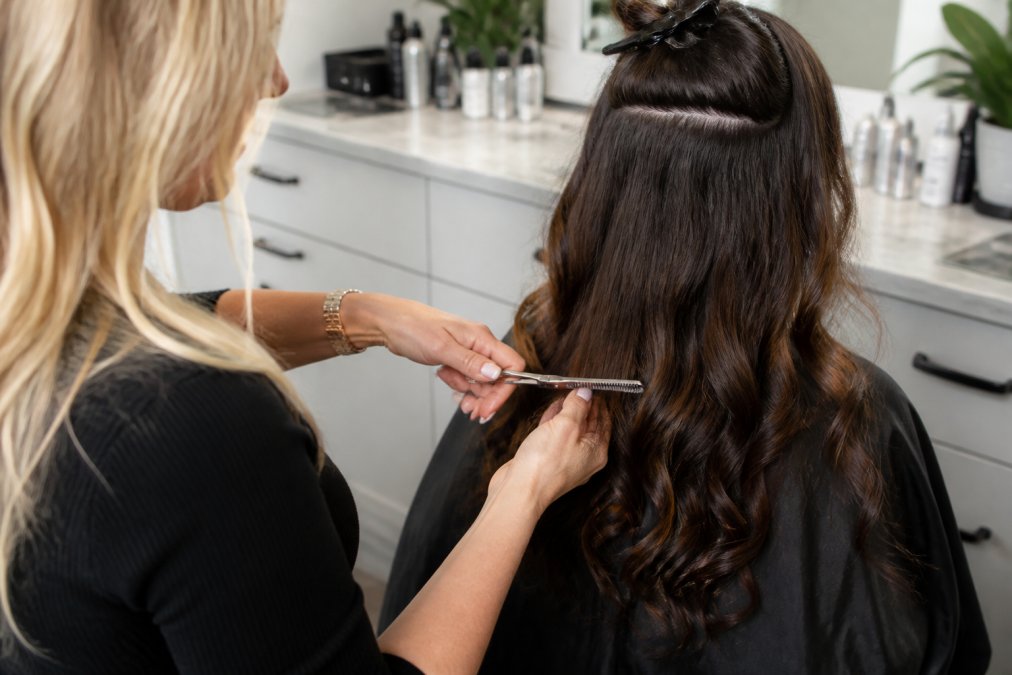
Case in point: the Sam Villa ArTeam's Ellen Devine cut and blended fresh extensions to match the client's natural texture and length, producing a seamless finish (Sam Villa Hair tutorial).
Step 4: The Best Tools for Blending Hair Extensions
The right tools determine how clean your blend looks. Three essentials cover almost every install:
- Blending shears for slide-cutting and tapering without blunt lines
- Sectioning clips to isolate natural hair from wefts during placement and cutting
- A dedicated extension brush with graduated bristles to detangle without pulling at attachment points
Millionaire Beauty Brand Extensions' MBB Gold Hair Extension Brush ($30) is built with longer center bristles and shorter edge bristles specifically to work around wefts and tape tabs without snagging. For travel or touch-ups between salon visits, the Gold Mini Brush ($20) does the same job in a compact format. If you're installing or maintaining wefts professionally, the Hair Extension Pliers ($40) and Hair Extension Scissors ($15) round out a professional kit.


| Tool | Price | Best For |
|---|---|---|
| MBB Gold Hair Extension Brush | $30 | Daily detangling around wefts |
| Gold Mini Brush | $20 | Travel and on-the-go touch-ups |
| Hair Extension Pliers | $40 | Professional weft installation |
| Hair Extension Scissors | $15 | Precision trimming and blending |
Step 5: Strategic Placement of Wefts and Safe Zone Identification
Strategic placement is what makes an install invisible. The safe zone is the band of hair roughly 1 to 2 inches from the scalp where tension won't damage the follicle. Placing wefts outside this zone risks traction alopecia and visible track lines. Section hair horizontally, leaving a clean part line, then position each weft so it lies flat against the scalp with no bunching. Current 2026 styling guidance recommends braiding and securing the bottom layer of natural hair before positioning wefts to create a more secure, undetectable foundation (The Daily Iowan extension methods guide). Volume matters too: too little hair per weft creates gaps, too much creates bulk that refuses to lay flat.
Step 6: How to Prevent Hair Extension Tangling
How to prevent hair extension tangling comes down to three habits: brushing correctly, washing correctly, and never sleeping on loose hair. Tangling almost always starts at the attachment point, where natural hair sheds and wraps around the weft if it isn't brushed out daily. Use a loop-bristle extension brush twice a day, working from ends to roots. Wash with sulfate-free shampoo in a downward motion, never scrubbing in circles. Before bed, braid hair loosely or tie it in a low ponytail with a silk scrunchie. A 2026 safety review confirms that damaged natural hair makes achieving a seamless transition significantly harder, so protecting your own hair protects the blend (EH Hair Extensions safety guide).
Step 7: Styling Techniques for Seamless Integration
Styling is where the blend either holds or falls apart. The professional framework used by top colorists follows six steps: correct method selection, color matching, strategic placement, precision cutting, styling, and natural hair health (Vixen and Blush blending guide). For daily styling, curl or straighten natural hair and extensions together in the same pass, using the same tool and heat setting. Always apply heat protection first. Wrap sections around the barrel in alternating directions to avoid a uniform, wig-like curl pattern. Finish by shaking the hair upside down and finger-combing to break up any visible separation between natural and extension hair.
Blending Extensions for Fine or Thinning Hair
Fine and thinning hair is the hardest texture to blend, and most guides skip it entirely. The core problem is density mismatch: a single weft carries more hair per inch than fine natural hair, so any placement that puts extension hair directly against fine hair creates a visible transition line. The fix is not more hair, it is less hair, placed more strategically.
Start with the density math. If your natural ponytail circumference is under two inches, you are in the fine-hair range and should cap your install at roughly one-third of your natural density in extension hair. That usually means two to four lighter wefts rather than a full set. A common pattern is to place the first weft about one inch back from the hairline, then space subsequent wefts two to three inches apart so each one has natural hair to camouflage it.
Placement beats volume every time. Push wefts toward the perimeter and the sides rather than the crown, where fine hair is thinnest and tracks show fastest. For the hairline itself, a root smudge, a demi-permanent color applied in a soft shadow at the base, softens the line where extension meets scalp far better than trying to color-match the root exactly.
Texture is the second battle. Fine hair is smooth and lies flat; most extension hair is thicker and has more body. Bridge the gap with a lightweight texturizing spray or a dry shampoo applied at the mid-lengths of the natural hair, not the roots, to add grip without weight. Avoid heavy serums and oils, they collapse fine hair and make the density difference more obvious, not less.
For thinning hair specifically, hair toppers often blend more naturally than full weft systems because they integrate with existing density rather than sitting underneath it. Clip-ins in a lighter weight can work for occasional wear, but tape-ins and hand-tied wefts placed too close to the scalp risk traction on already-compromised follicles. When in doubt, fewer attachment points and lighter wefts win.
Millionaire Beauty Brand Extensions' 100% human hair toppers and clip-ins are designed for exactly this scenario, letting you add fullness without adding weight that fine hair can't support.
Frequently Asked Questions
How can I make my extensions blend better with my natural hair?
Start with a precise color match and strategic weft placement, then use slide-cutting on the perimeter of your natural hair to bridge the length gap. A six-step professional framework from Vixen and Blush (2026) includes choosing the right method for your hair type, color matching, placement, precision cutting, styling, and blending. The right tools, like a specialty extension brush, also prevent tangling that ruins a seamless look.
Why do my hair extensions look obvious and not blend?
Common causes include track visibility, incorrect volume, and texture mismatch. If too much hair is installed, wefts won't lay flat. If your natural hair is fine and extensions are thick, the density difference shows. Professional stylists also note that damaged natural hair makes blending significantly harder. Using the correct method for your hair type and cutting a natural layer resolves most blending issues.
Can I use heat styling to help blend my extensions?
Yes, but with caution. Use a heat protectant and keep tools below 350°F. For a lower-heat option, braid and secure the bottom layer of natural hair before positioning wefts, as recommended in 2026 styling advice from The Daily Iowan.
How do I prevent tangling in my hair extensions?
Brush extensions twice daily with a loop-bristle or extension-specific brush, starting from the ends and working upward. Never brush wet extensions without a detangling spray. Wash with sulfate-free shampoo and condition mid-length to ends only. Proper brushing and washing routines are top factors in extension longevity and tangle prevention.